How to run Cypress auto-tests on Woodpecker CI and report results to Slack


Open-source testing framework called Cypress is famous adorable tool which dramatically improves quality of web applications and saves our manual QA team from tedious Groundhog Days. Most time manual guys who came to our company and see how cypress works say "wow, I want to learn how to create such tests too". This exciting emotions and eager in eyes even made me think: "why not to give them such opportunity?". So we created department which is responsible for transforming Manual QAs into Auto-testing Gurus in their educational time-slots, and even despite the lack of deep web knowledge of such new members the idea was worth it.
So you start using cypress, cover some pages and feel inspiration about being able to imitate the user and replace manual QAs. At this point you might think that it would be better to run your tests automatically after application released or run them on periodical bases, for example every 3 hours. And it is exactly what this post is about! Here is what we will do here:
- Setup automatic Cypress pipeline using Woodpecker CI. I have recently published a post about how to install Wodpecker CI.
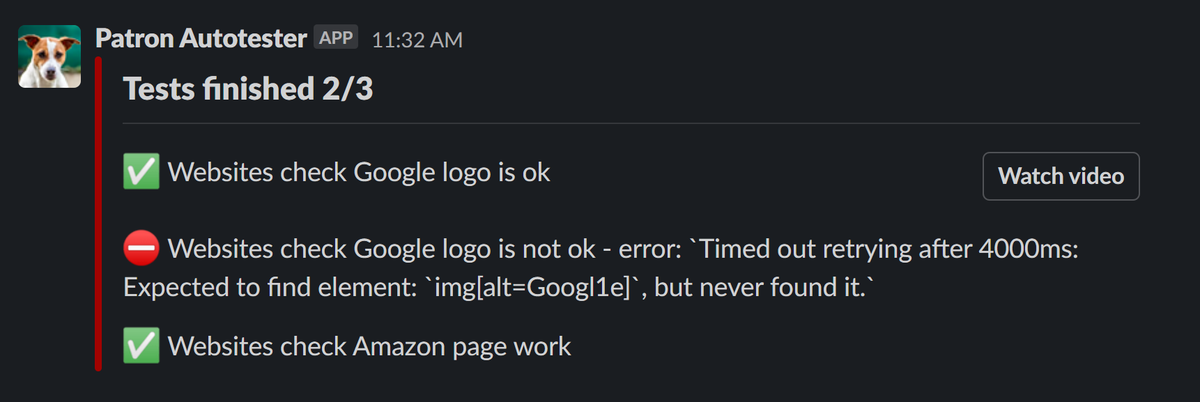
- Every test will post results into Slack and mark every single items with ✅Pass/⛔Failed status. For Failed test it will show error.
- We will store video recordings of failed tests on Amazon S3 bucket. To do it we will securely setup Bucket and configure AWS IAM user with limited permissions.
- To minimize costs on storing video recordings we will setup auto-removal of old videos
To report results directly to Slack we wrote our own open-source reporter which is suitable for Mocha/Cypress. Feel free to fork repository if you want to implement integrations with other communication tools.
So our fascinating automation journey starts now!
Creating Amazon S3 bucket to store recorded videos of failed test sessions
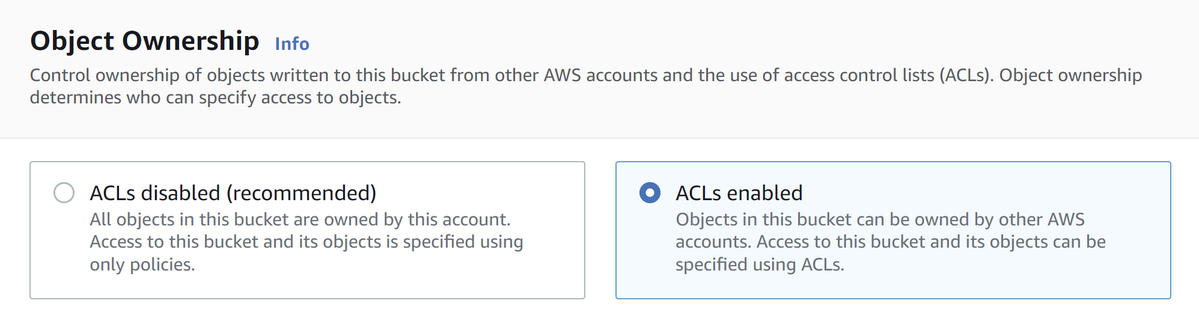
Go to AWS Management Console and navigate to S3 service. Click Create bucket. Type some unique bucket name, for example <my project name>_e2e_recordings, select region, in Object Ownership section select ACL enabled:
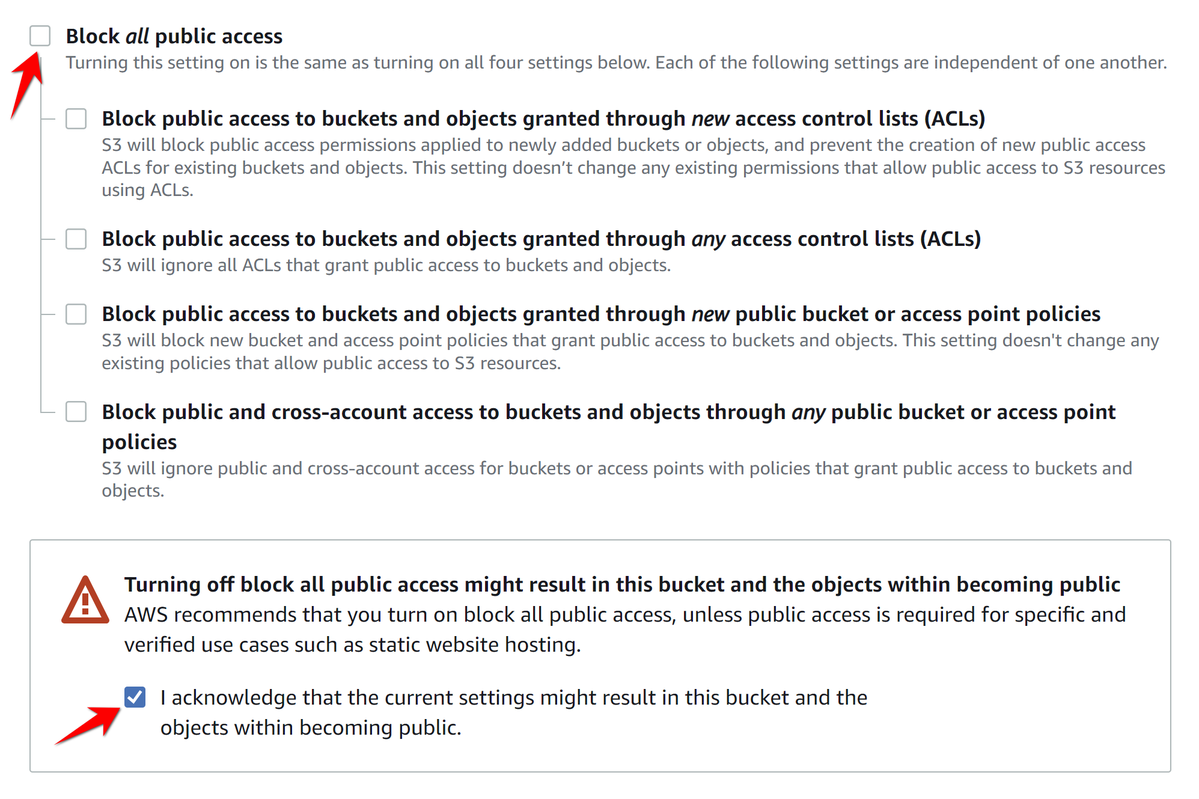
Our Videos will have no sensitive information because they will just record UI which available to all users. That is why we can safely make them public. To do it uncheck Block all public access:
Once bucket is created we can setup auto removal so will will not overpay for old unneeded objects.
Setup S3 objects expiration
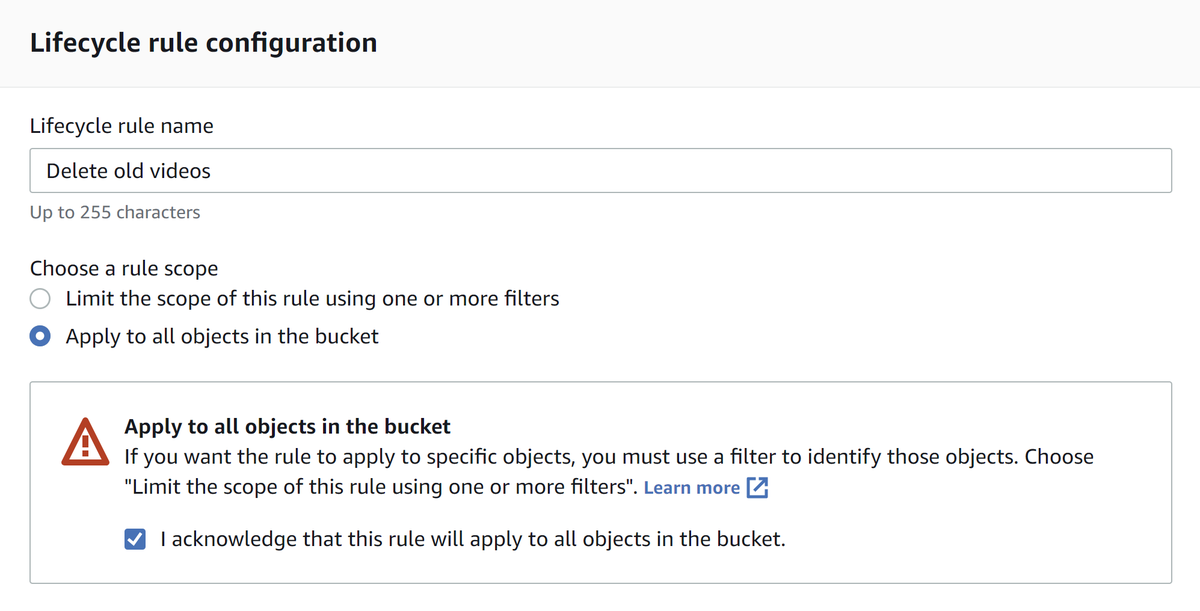
Go to Bucket settings, open Management tab and click Create lifecycle rule. For name you can use something like Delete old videos, for Choose a rule scope you can use Apply to all objects in the bucket:
In Lifecycle rule actions mark Expire current version of objects:
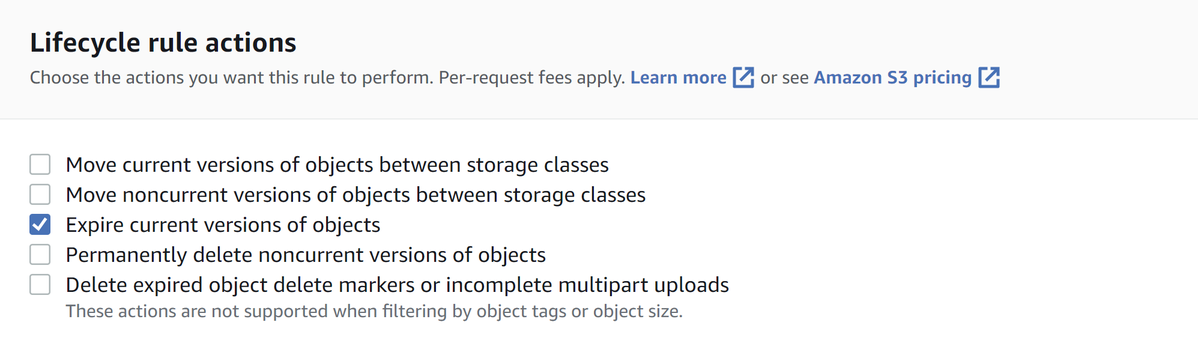
In Expire current version of objects select number of days after which you want to delete recorded test videos. This should be time which is enough for your QA team to review and analyze.

Creating AWS Access Key ID and Secret credentials with restricted access to bucket only
The main idea here is to create API credentials pair for our pipeline which will use official AWS CLI. We will also take care on limiting all API actions so API user will be able to work with our bucket only, and will not be allowed to work on other AWS infrastructure if you have it in your account.
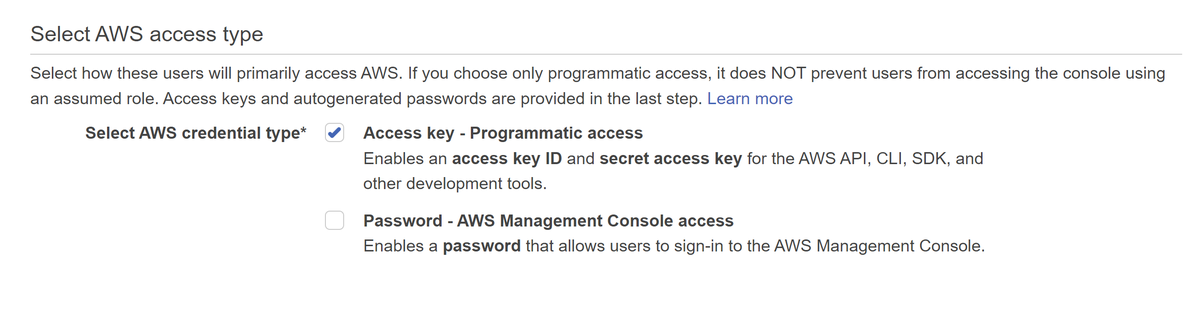
Go to IAM service in AWS Console, click Add users, call user e.g. <my project name>_e2e_recordings_uploader, check Access key - Programmatic access only:
On second step click Attach existing policies directly , then click Create policy button, select JSON and paste this code:
{
    "Version": "2012-10-17",
    "Statement": [
        {
            "Sid": "forE2eVideosUploader",
            "Effect": "Allow",
            "Action": "s3:*",
            "Resource": [
                "arn:aws:s3:::<Your bucket name>/*"
            ]
        }
    ]
}
Don't forget to replace <YOUR BUCKET NAME> with real name! After creating user copy Access Key ID and Secret
Configuring Woodpecker pipeline
Create repository for your tests and initialize your cypress project using version 10.2.0 or later.
Also we suggest you to install cypress-network-idle module which waits for all network requests are executed and improves stability of tests for many websites:
npm i -D cypress-network-idle
For demo I will create one simple test in folder cypress/e2e/. I will call file myTest.cy.js:
import 'cypress-network-idle';


describe('Websites check', () => {
    it('Google logo is ok', () => {
        cy.viewport(1920, 1080);
        cy.visit('https://www.google.com/');
        cy.waitForNetworkIdle(1000);
        cy.get('img[alt=Google]').should('be.visible');
    });
    it('Google logo is not ok', () => {
        cy.viewport(1920, 1080);
        cy.visit('https://www.google.com/');
        cy.waitForNetworkIdle(1000);
        cy.get('img[alt=Googl1e]').should('be.visible');
    });
    it('Amazon page work', () => {
        cy.viewport(1920, 1080);
        cy.visit('https://www.amazon.com/');
        cy.waitForNetworkIdle(1000);
        cy.get('body').should('be.visible');
    });
});
Now in root of our repository create folder .woodpecker and file .myTest.yml with the next content:
global-variables:
  - &testName
    TEST_NAME=myTest # It is your filename base. We use myTest because our file called myTest.cy.js


pipeline:
  myTest:
    image: cypress/included:10.2.0
    environment:
      - *testName
    commands:
      - npm install
      - npm install --no-save ci-slack-reporter
      - export CI_SLACK_REPORTER_ICON_URL=https://raw.githubusercontent.com/devforth/ci-slack-reporter/master/assets/patron_autotester.png
      - export CI_SLACK_REPORTER_USERNAME="Patron Autotester"
      - export CI_SLACK_REPORTER_VIDEO_URL=https://<YOUR BUCKET NAME>.s3.<YOUR BUCKET REGION e.g. eu-central-1>.amazonaws.com/output${CI_BUILD_NUMBER}.mp4
      - export CI_SLACK_REPORTER_WEBHOOK=https://hooks.slack.com/services/<YOUR SLACK WEBHOOK>
      - cypress run --reporter ci-slack-reporter --spec "cypress/e2e/$${TEST_NAME}.cy.js"

  uploadToS3:
    image: amazon/aws-cli
    environment:
      - *testName
      - AWS_ACCESS_KEY_ID=<YOUR ACCESS KEY ID>
      - AWS_SECRET_ACCESS_KEY=<YOUR SECRET ACCESS KEY>
      - AWS_DEFAULT_REGION=eu-central-1

    commands:
      - aws s3 cp cypress/videos/$${TEST_NAME}.cy.js.mp4 s3://<YOUR BUCKET NAME>/output${CI_BUILD_NUMBER}.mp4 --metadata Content-Disposition=inline,Content-Type=video/mp4 --acl public-read

    when:
      status:
        - failure
Copy file above and make sure you replace all instances of the next values:
- <YOUR ACCESS KEY ID>
- <YOUR SECRET ACCESS KEY>
- <YOUR BUCKET REGION e.g. eu-central-1>
- <YOUR BUCKET NAME>
- <YOUR SLACK WEBHOOK>
You can now activate repo on woodpecker as described in guide push the code.
Here is how result looks in Slack:
Alternatively you can install woodpecker CLI to your machine to run pipeline locally. To install CLI on Debian-based/WSL Ubuntu use:
wget https://github.com/woodpecker-ci/woodpecker/releases/download/v0.15.3/woodpecker-cli_0.15.3_amd64.deb
sudo dpkg -i woodpecker-cli_0.15.3_amd64.deb
To start pipeline:
CI_BUILD_NUMBER=1000$RANDOM woodpecker exec --local
To understand failed cases you can simply watch video by clicking Watch video button:

Now your tests are really automated and be able to execute even while your QA are sleeping.

Bonus: run tests on behalf of different IP/Country using OpenVPN
Sometimes website which you test might be not available in country which runs your CI server or whitelisted to some network pools only. To easily workaround this case you can use OpenVPN client. For this you need OpenVPN server in your network which already has access to resource. Just create dedicated ovpn config (e.g. like described in Setup OpenVPN server on Ubuntu guide)
pipeline:
  myTest:
    image: cypress/included:10.2.0
    privileged: true
    environment:
      - *testName
    volumes:
      - /dev/net/tun:/dev/net/tun
    commands:
      - apt install -y openvpn
      - echo nameserver 8.8.8.8 > /etc/resolv.conf
      - openvpn ./vpn/tunnel-config.ovpn &
      - sleep 10
      - curl -s ifconfig.me
      - npm install
      - npm install --no-save ci-slack-reporter
      - export CI_SLACK_REPORTER_ICON_URL=https://raw.githubusercontent.com/devforth/ci-slack-reporter/master/assets/patron_autotester.png
      - export CI_SLACK_REPORTER_USERNAME="Patron Autotester"
      - export CI_SLACK_REPORTER_VIDEO_URL=https://<YOUR BUCKET NAME>.s3.<YOUR BUCKET REGION e.g. eu-central-1>.amazonaws.com/output${CI_BUILD_NUMBER}.mp4
      - export CI_SLACK_REPORTER_WEBHOOK=https://hooks.slack.com/services/<YOUR SLACK WEBHOOK>
      - cypress run --browser chrome --reporter ci-slack-reporter --spec "cypress/e2e/$${TEST_NAME}.cy.js"
VPN tunnel is created only inside of container with Cypress so whole CI server will still use normal (not tunneled) network connection.
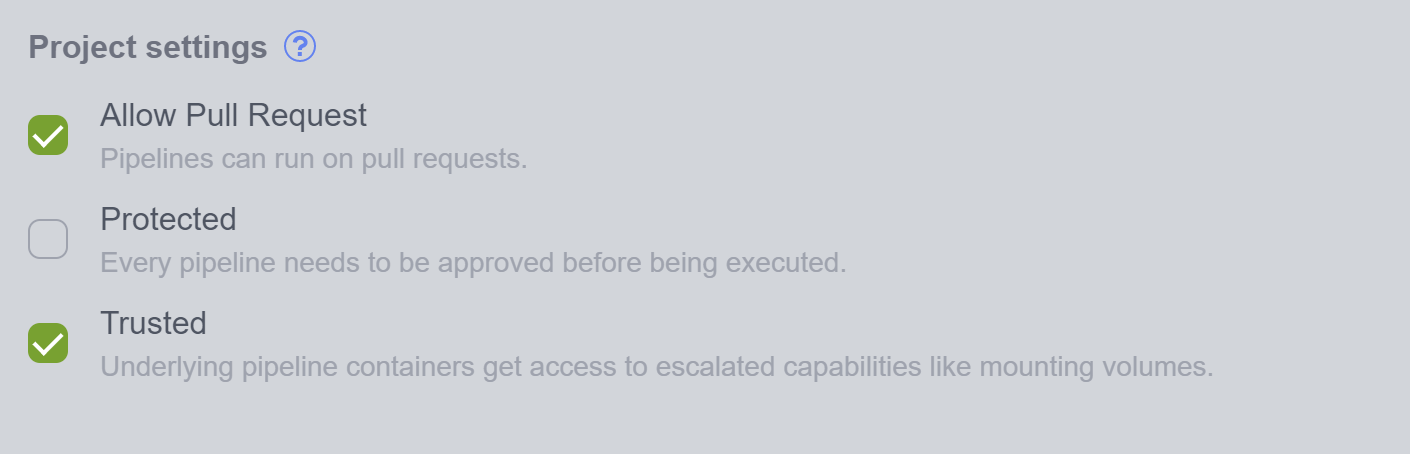
Also since we need privileged container mode, you need to enable Trusted in Woodpecker settings, otherwise you would get "Execution error: Insufficient privileges to use privileged mode". To enable options go to repository settings and tick the checkbox:
Useful Links
- Slack Webhook App page Use it to add Slack Webhook to your slack channel
- Guide how to setup Woodpecker CI
- Source code of CI Slack reporter and package on NPM