
Dookerized deploy setup using Woodpecker CI and with building images on application server
Secure and automate Docker-based deployments with Woodpecker CI over TLS. This step-by-step guide shows how to configure a VPS, set up a custom Certificate Authority, enable secure remote Docker access, and deploy web, desktop, or mobile apps via docker-compose — with optional direct local deployment for debugging or emergencies.
Here, I will show the simplest and fastest way to automate the deployments of the web apps of any complexity level. We will use a TLS connection between the Woodpecker CI host and the Application host.
This setup could be reused to build desktop apps or mobile apps in any docker-based pipelines. For example, it could be easily adjusted to build electron/cordova/ionic apps.
In short, the deployment will be done in the next way:
- We will create a
docker-compose.ymlfile that delivers resources and apps to any machine. - Order VPS (or dedicated) host with public IP, ssh access, and open application ports (e.g. port 80 for web).
- Create Certificate Authority (CA) and create server keys on server, and then sign keys with our CA
- Configure Docker settings on VPS to enable TCP connection for secure Docker deployments from our CI machine.
- Create bash script that installs generated certificates into Woodpecker Build Container, and then will export
DOCKER_HOST=tcp://<host IP>:<PORT>to activate docker context remotely, so when we will executedocker-compose upit will spawn our containers on remote host.
Optionally, you will be able to use TLS certificates to run deploy directly from your local machine without CI (for example, it might be handly for debug or some emergency will happen with your CI server).
This guide assumes build of docker images is done on Application Server. While this approach is simpler and requires no additional software (e.g. Docker registry), it might be not efficinet or do not work due to RAM limits on small servers, especially if you are using alpine images where a lot of packges (npm/pip) require compilation from source. For best performance we recommend following guide which explains how to build images directly on CI server, push to Harbor Registry, and deploy to application server.
What is Woodpecker CI
Woodpecker is a simple, truly open source CI engine with awesome flexibility and extensibility. It allows you to run any pipelines inside of Docker containers, so all your builds will smoothly execute in stable environments with guarantee of same tools/libraries versions. You will be easily debug your builds on local docker daemon and then just run same code on CI.
Order VPS server for our application
We used Ubuntu 20.04 OS for Amazon EC2 t3.micro instance (you can use any hosting). Less than 1 GB might cause memory and subsequent hanging up issues, though it depends on code that you will build.
We will also need OpenSSL there. In our example, we used OpenSSL 1.1.1f.
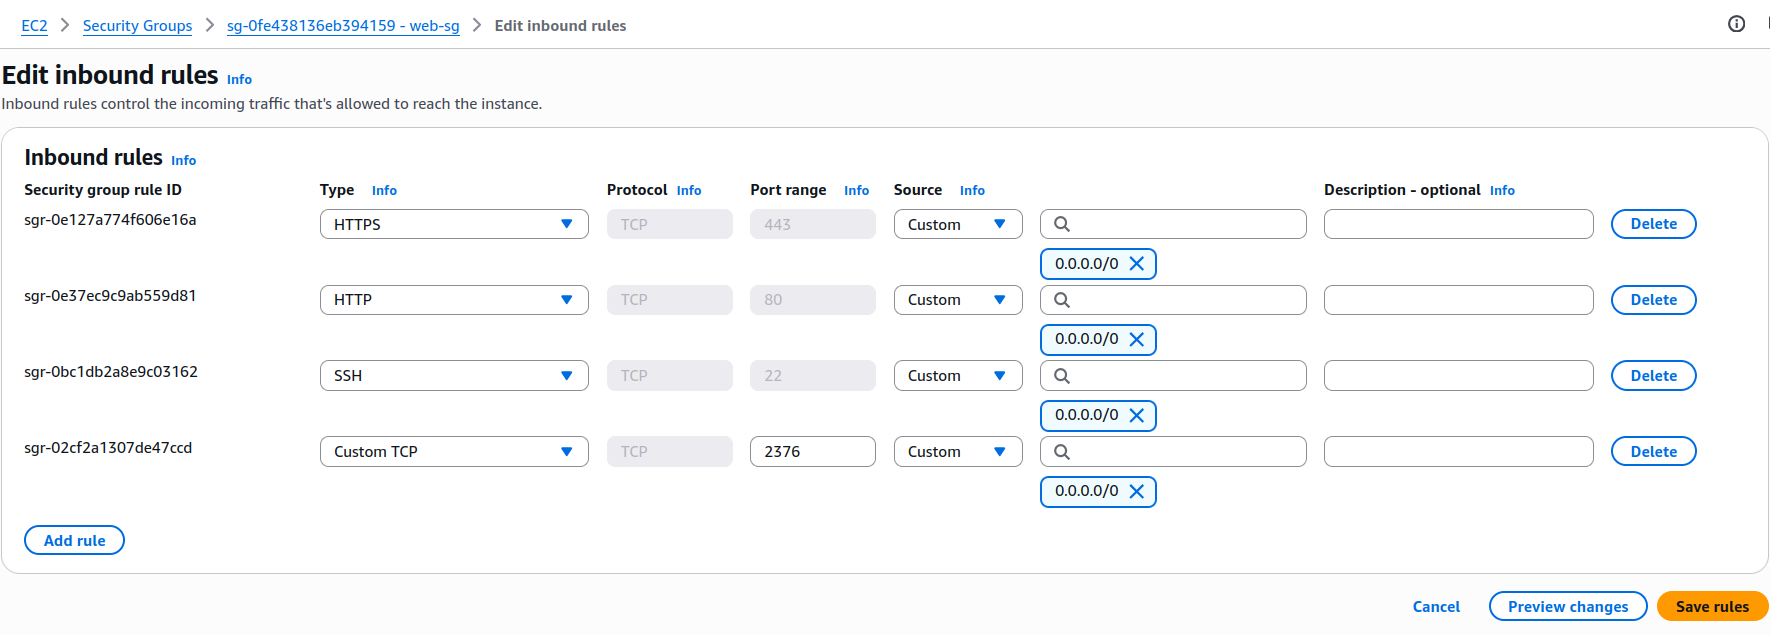
You need to have the next TCP ports open:
TCP 22we need it for the SSH connection to configure the server- Dedicated port for our secure Docker connection, we will use port
TCP 2376 - All ports that your application are listening on (e.g.
TCP 80,TCP 443)
If you use Amazon EC2, all ports are closed by default, but you can open ports in Security Group configuration. To do it on instance setup phase, click Edit security groups:
Many VPS/Dedicated hosting providers have all ports open by default.
Connect to our server
Login as ubuntu user with .pem file downloaded from AWS Console:
ssh -i ~/xx.pem ubuntu@xxxxxSwitch to root mode for convenience
sudo bashPrepare docker host
For beginning, we should uninstall all old dockers
apt remove docker docker-engine docker.ioAfter uninstall, update packages and install a new docker
apt update && apt install docker.ioCreate the certificates
If you want to see a sequence of commands, you can see our git repository but if you don’t want to go deeper, just run next command on the server:
curl -s -L https://raw.githubusercontent.com/devforth/docker-tls-generator/main/generate-tls.sh | bash
Prepare repository
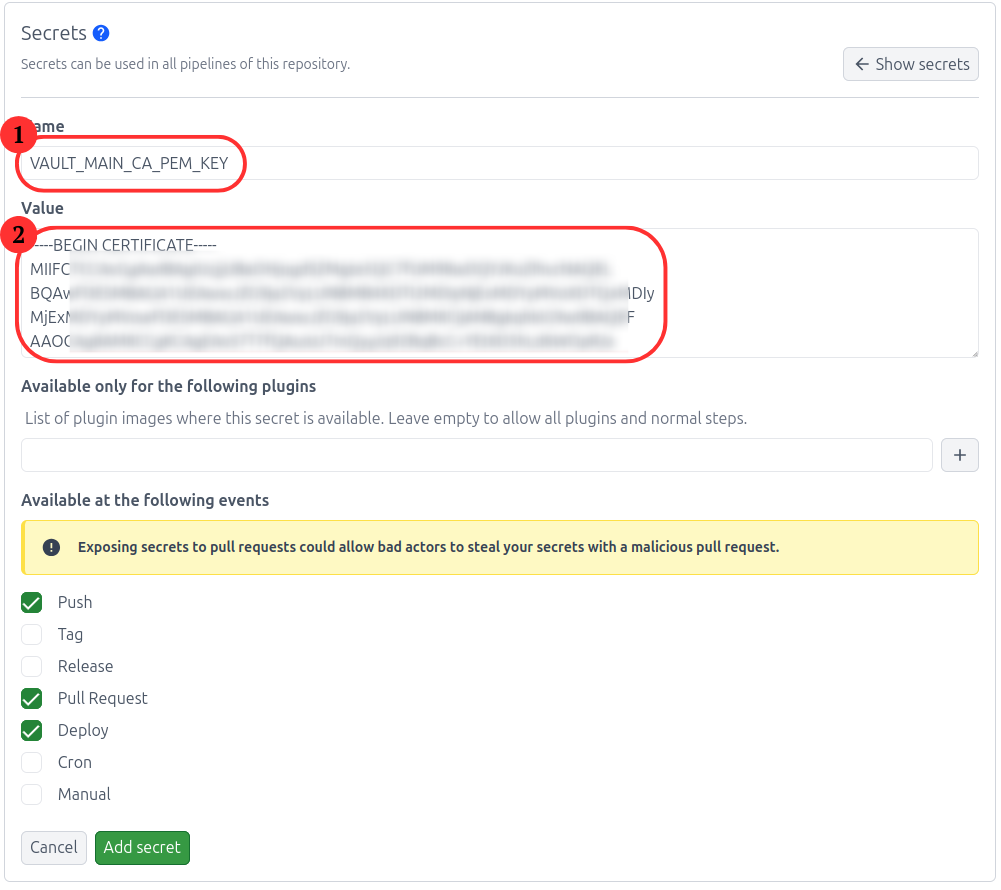
For better security, add keys to woodpecker Secrets. Never push them to GitHub Repository. Then CI server will be only point of secrets. In same way you should add to secrets any sensitive information (e.g. db password, external REST API keys, and so on).
To do this, you have to open the settings and add a new key


Now, on the server where you created the certificates, you must open each certificates in the folder ~/.docker
For example, we add ca.pem to woodpecker secrets
cat ~/.docker/ca.pemAnd copy our key AS IS (no new lines, no breaks, just copy it) then create name and paste our ca.pem key and save:
it needs to be repeated with the keys
- Secret name:
VAULT_MAIN_CA_PEM_KEY. Secret Valuecat ~/.docker/ca.pem - Secret name:
VAULT_MAIN_KEY_PEM_KEY. Secret Valuecat ~/.docker/key.pem - Secret name:
VAULT_MAIN_CERT_PEM_KEY. Secret Valuecat ~/.docker/cert.pem
These keys should be specified in .woodpecker.yml an example is below
Then you need to enable trusted repository
For it, go to settings and enable Trusted
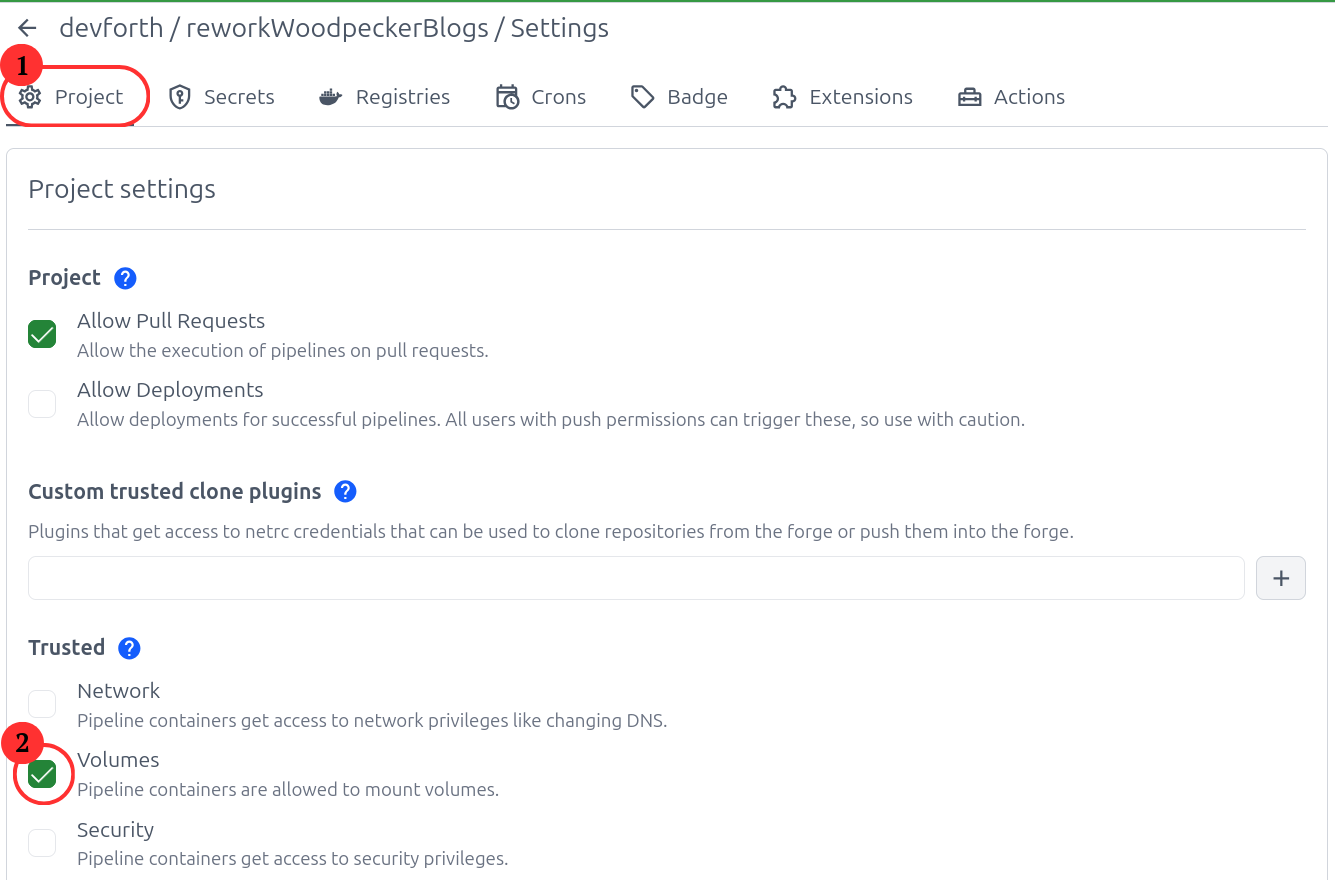
If you do not see
Trustedor you cannot activate, contact the administratorwoodpecker server
As an example, we will show the config for our small project.
.woodpecker.yml
steps:
  build:
    image: docker:20.10.16
    volumes:
      - /var/run/docker.sock:/var/run/docker.sock
    environment:
      VAULT_MAIN_CA_PEM_KEY:
        from_secret: VAULT_MAIN_CA_PEM_KEY
      VAULT_MAIN_KEY_PEM_KEY:
        from_secret: VAULT_MAIN_KEY_PEM_KEY
      VAULT_MAIN_CERT_PEM_KEY:
        from_secret: VAULT_MAIN_CERT_PEM_KEY
    commands:
      - cd deploy
      - /bin/sh build.sh
Notice the field of
secretshere are the keys that we added to the secrets at the previous stage
Create file build.sh in deploy directory:
#!/bin/bash
set -e
HOST_DOMAIN=<ip address of your server>
mkdir -p ~/.docker/$HOST_DOMAIN
echo "$VAULT_MAIN_CA_PEM_KEY" > ~/.docker/$HOST_DOMAIN/ca.pem
echo "$VAULT_MAIN_KEY_PEM_KEY" > ~/.docker/$HOST_DOMAIN/key.pem
echo "$VAULT_MAIN_CERT_PEM_KEY" > ~/.docker/$HOST_DOMAIN/cert.pem
export DOCKER_BUILDKIT=1
export DOCKER_HOST=tcp://$HOST_DOMAIN:2376
export DOCKER_TLS_VERIFY=1
export DOCKER_CERT_PATH=~/.docker/$HOST_DOMAIN
docker builder prune -f # don't add -a here, it will destroy build cache
docker container prune -f
docker compose -f docker-compose.yml up -d --build --remove-orphans
Don’t forget to change $HOST_DOMAIN to your docker host ip (where app will be deployed)
Also create docker-compose.yml file in deploy directory.
version: '3'
services:
    front:
        image: strm/nginx-balancer
        container_name: load-balancer
        ports:
            - "80:8080"
        environment:
            - "NODES=web1:80 web2:80"
    web1:
        image: strm/helloworld-http
    web2:
        image: strm/helloworld-http
If you did it right, you should see on your IP server in your browser
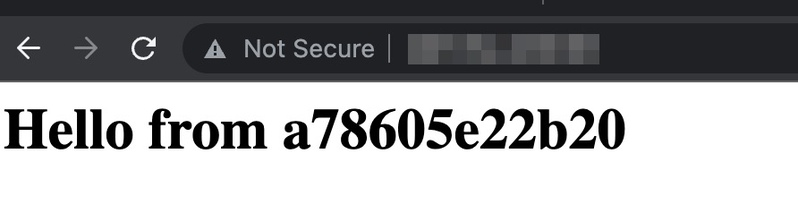
That's all
Wish you successful and fast build.
Bonus: add build messages to Slack
Add into pipeline section (on the same level where build) before build to .woodpecker.yml
steps:
  slack-begin:
    image: plugins/slack
    environment:
      SLACK_WEBHOOK:
        from_secret: slack_webhook
      SLACK_USERNAME: Woodpecker
      SLACK_ICON: ${CI_COMMIT_AUTHOR_AVATAR}
      SLACK_TEMPLATE: >
        {{repo.name}}/{{build.branch}} - Started #{{build.number}} "${CI_COMMIT_MESSAGE}" by {{build.author}} "${CI_COMMIT_AUTHOR} (${CI_COMMIT_AUTHOR_EMAIL})" (<{{build.link}}|Open>)
  build:
    ...
Add Slack webhook app, select desired channel, and paste final webhook into SLACK_WEBHOOK secret.
Add after build:
  build:
    ...
  slack-end:
    image: plugins/slack
    environment:
      SLACK_WEBHOOK:
        from_secret: slack_webhook
      SLACK_USERNAME: Woodpecker
      SLACK_ICON: ${CI_COMMIT_AUTHOR_AVATAR}
      SLACK_TEMPLATE: >
        {{repo.name}}/{{build.branch}} - #{{build.number}} {{uppercasefirst build.status}} after {{since build.started}} (<{{build.link}}|Open>)
    when:
      - status: [success, failure]